Hey there! 👋
Thank you for choosing Deliveri. We are pleased to present you the first steps. We recommend that you complete the guide here in order so you can start shipping faster! Let's go! 🎉
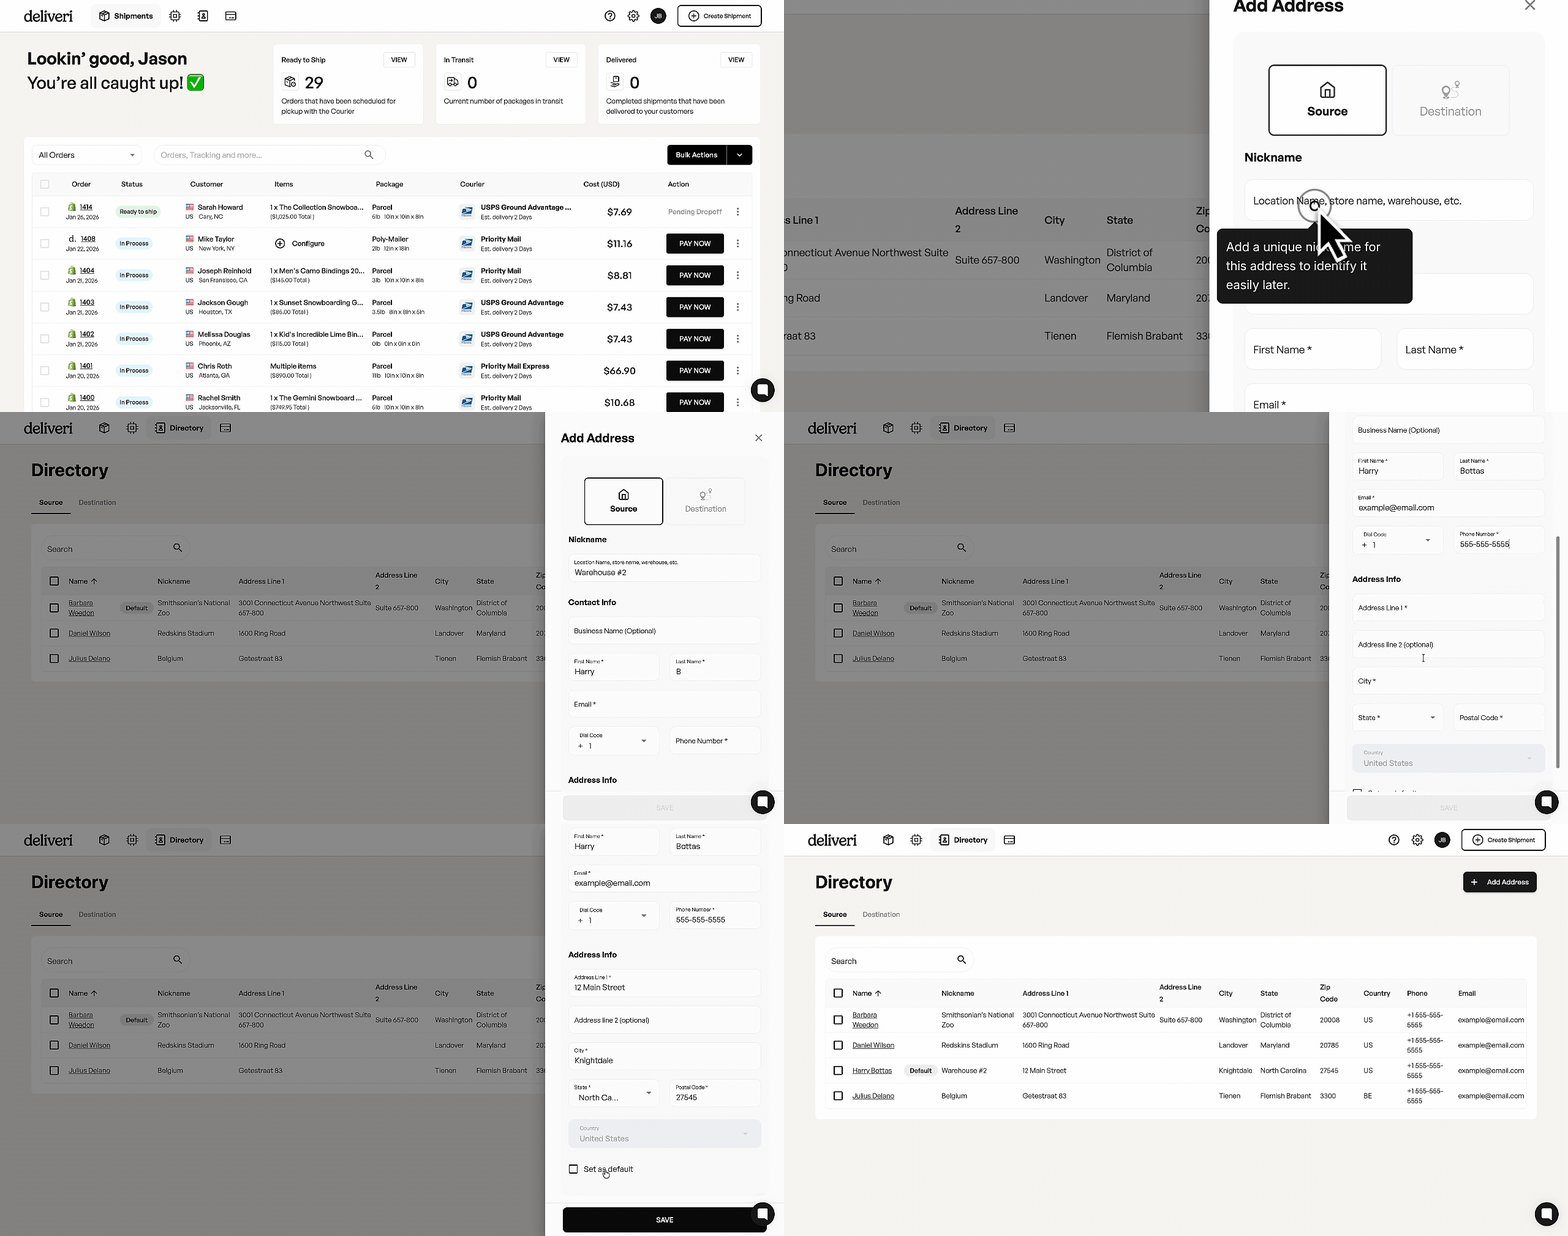
Set up your directory
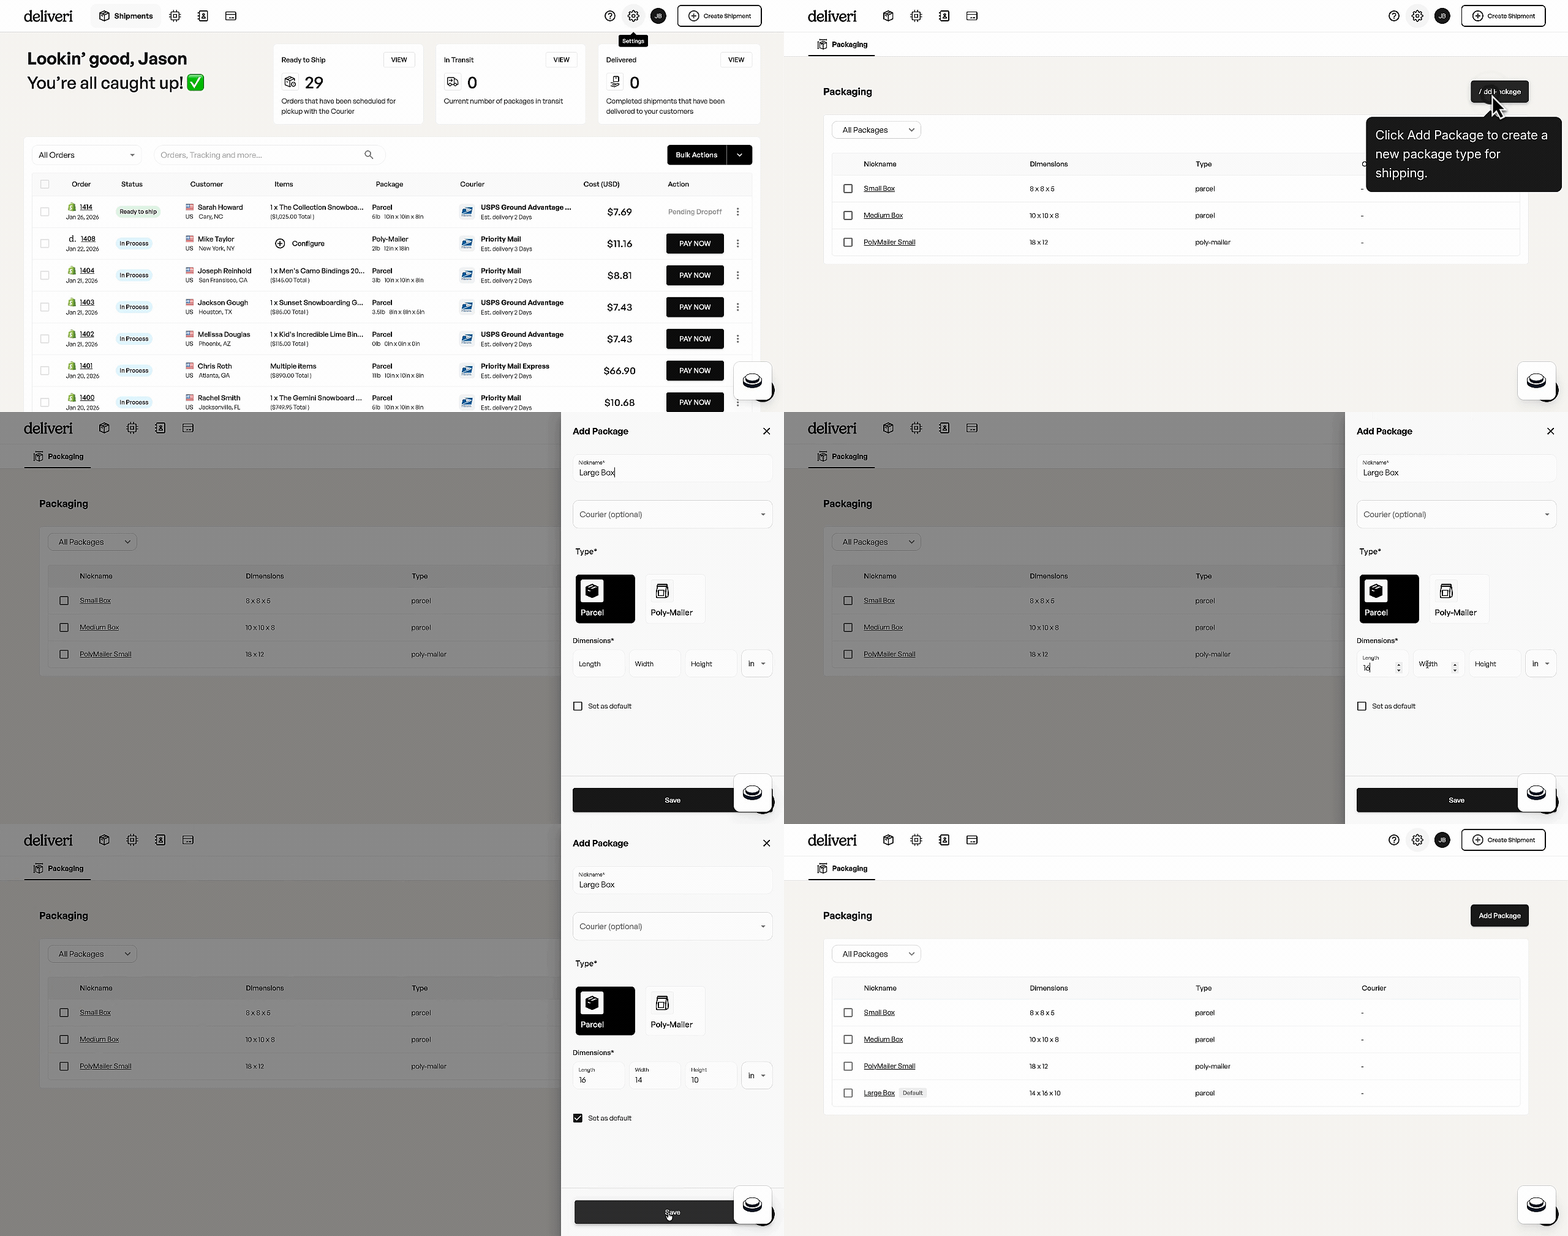
Configure your custom packages
Connect your Shopify Store
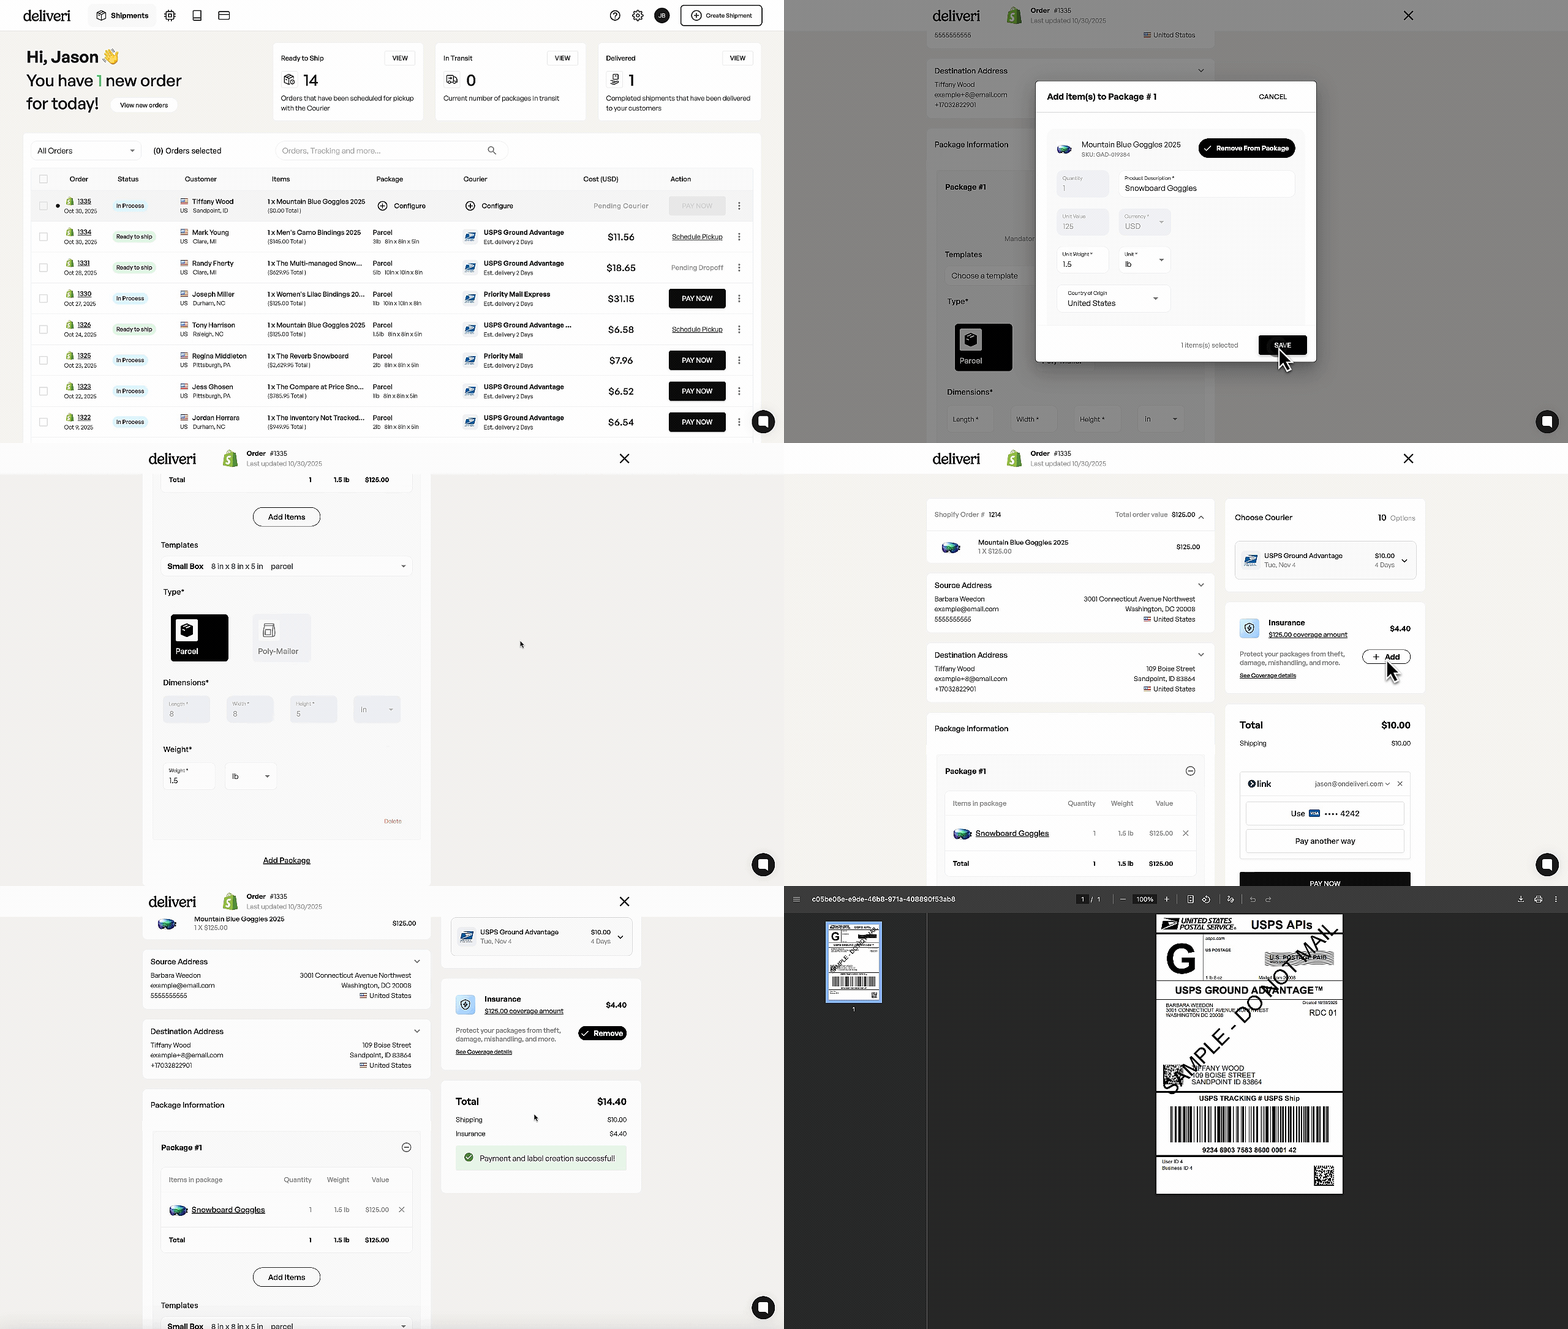
Create your first label
Navigate to the Directory
Click Add Address
Input the Address details
(Optional) Set as Default
Click Save
Navigate to the Settings ⚙
Select Packaging
Click Add Package
Input Package Details
(Optional) Set as Default
Click Save
If you already have a Deliveri account:
Log in to your Deliveri dashboard
Click the Connections tab at the top navigation
Click Connect under the Shopify option
Log in to your Shopify store (if you are not already logged in)
Approve the connection
Once connected, your store will appear in the Connected Webstores section.
That’s it. Your orders will now sync into Deliveri.
You can also connect by installing Deliveri directly from the Shopify App Store:
👉 https://apps.shopify.com/deliveri
Steps:
Click Install (new users) or Open (if already installed)
Log in to Deliveri (if prompted)
Approve the app connection
This method will automatically link your Shopify store to your Deliveri account.
Both methods are equally supported and easy. Choose whichever feels more convenient.
Steps:
Click Create Shipment (in the upper right corner) or Select a Shopify Order (if new order present)
In the Source Address section select from Template or Enter Address Manually.
In the Destination Address enter the recipient address.
Click Package Information and enter the package Items (optional), and Dimensions (Length, Width, Height, and Weight).

Select if the package is a Parcel or Poly-Mailer.
Enter the weight of the package.
Once all required fields are complete, the Courier Rate request will trigger automatically. If you do not see any rates, please check your inputs for accuracy.
If you need help selecting the right UPS service for your shipment, contact our support team at [email protected] or call (919) 804-1779.